Improve the security of an infrastructure by setting up an OpenVPN Server
Improve the security of an infrastructure by setting up an OpenVPN Server
✋🏻 Hello once again. In this report, we’ll cover an important aspect of network infrastructure security: the VPN (Virtual Private Network). Specifically, we are going to set up an OpenVPN server that will do a lot of cool stuff in our network.
Overview
📋 Table of Contents
Introduction and Concepts
When you scroll through the social media apps, there is a high chance that you may have come across some of these memes:
The very first question that comes to mind, especially if someone didn’t hear about it before, is what’s a VPN.
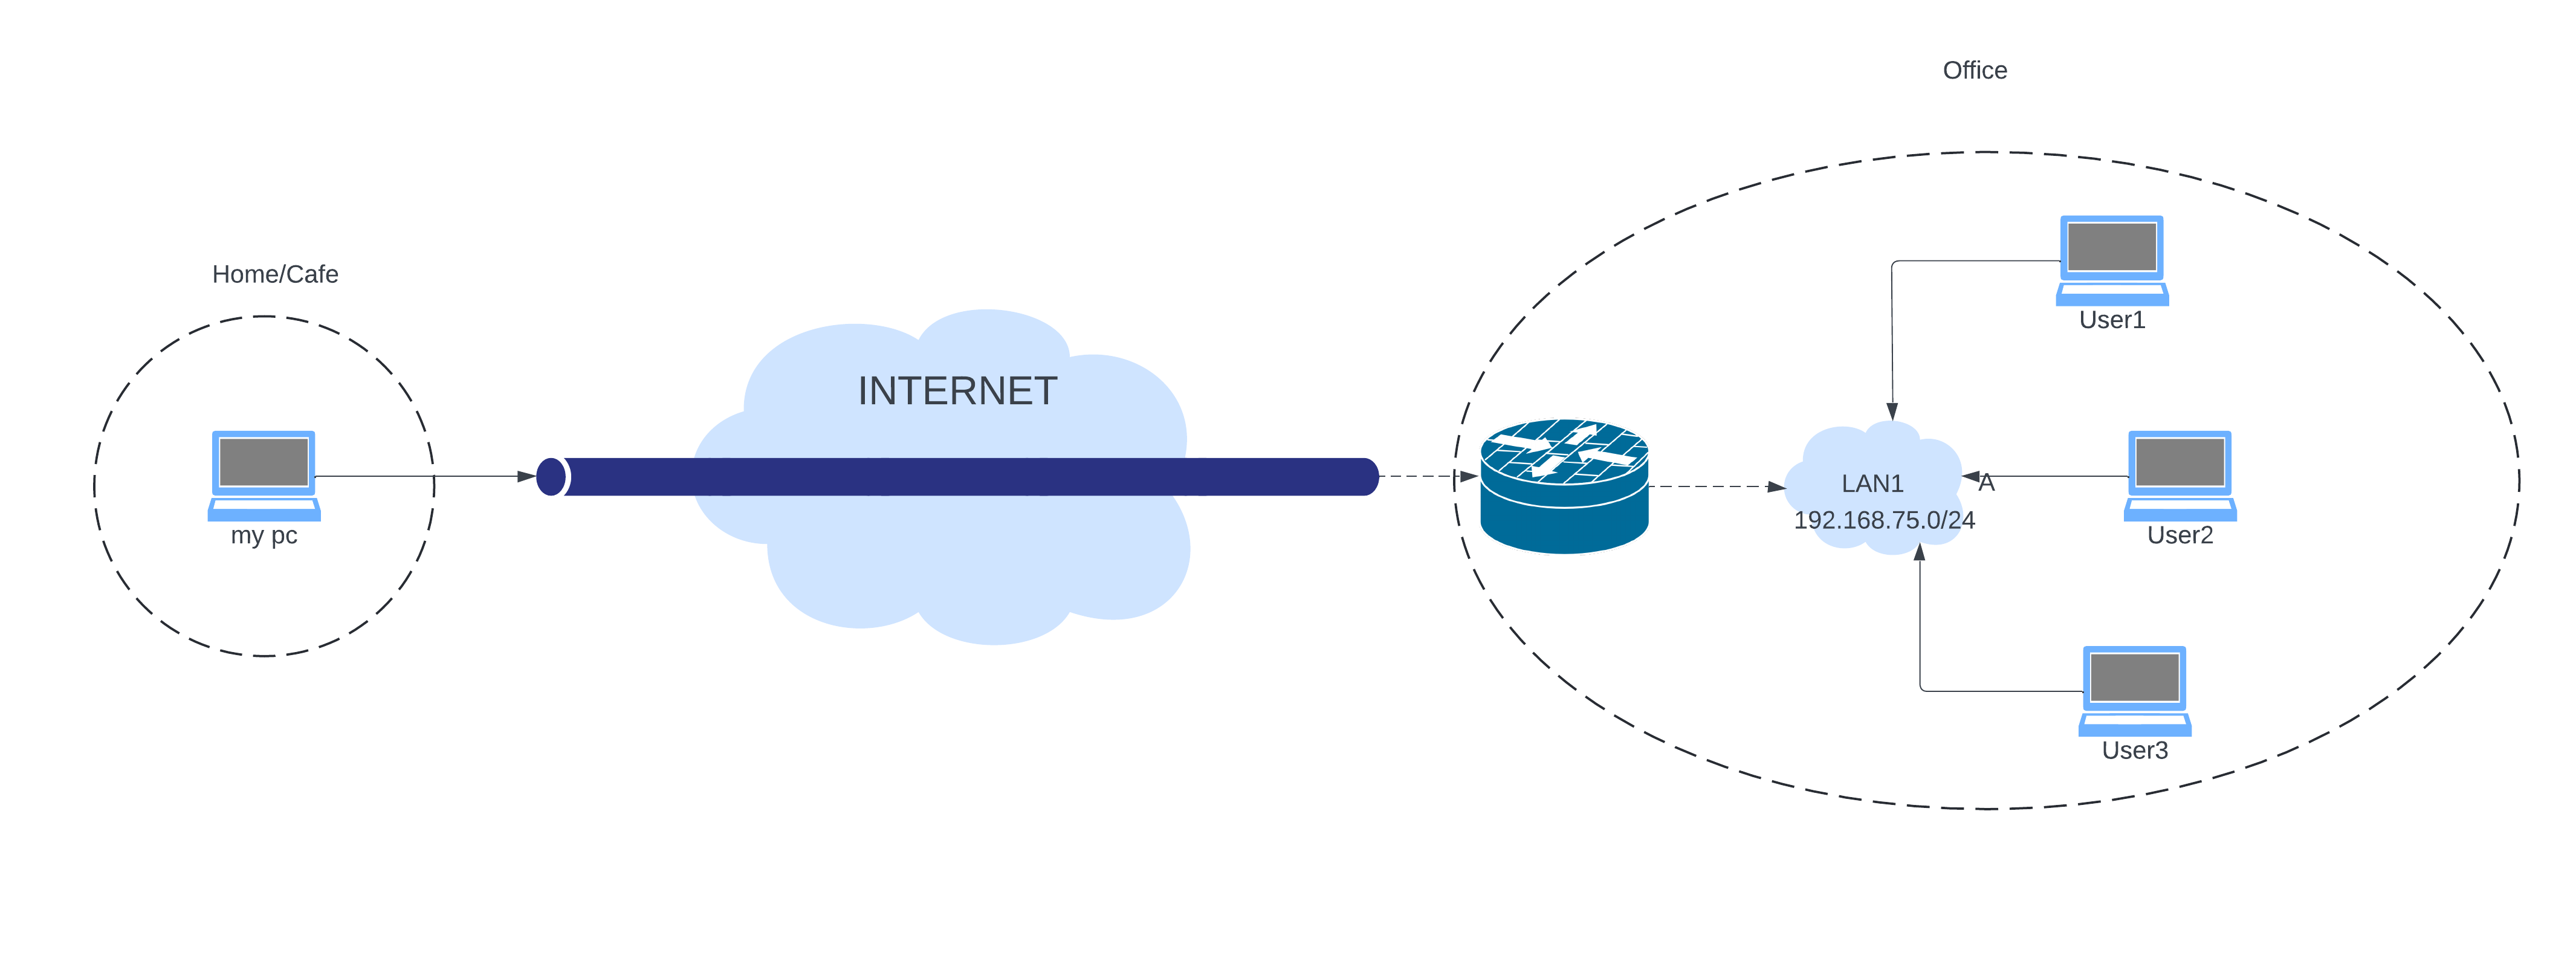
VPN stands for Virtual Private Network; it’s a secure, encrypted connection between your device and a server that is established over the internet. In the process, it creates some type of encrypted tunnel in which one can assure, without any possible risk of eavesdropping, that their online activities will remain as private as possible even to a public Wi-Fi network.
VPNs are widely used to enhance privacy, bypass geographical content restrictions, and securely connect to remote networks.
Some of the big examples are pentesters wanting to test some vulnerabilities on a machine; sometimes they need to be on the same local network as the target. It would be a heck of a pain to move physically to where the network is and plug your machine every time.
Admins, too, face this when they need to fix downed servers or change configurations, especially when they’re far away and can’t reach them in person.
The VPN offers a solution to these kinds of problems.
In the next chapters, we will focus on the configuration of OpenVPN which is an open-source VPN software that creates secure, encrypted connections between devices over the internet. So to simulate real-world situations, we’ll be using VMware and 4 VMs
- An ubuntu machine for the server
- Two Ubuntu Machines, one windows as clients
Configuration
In VPNs, there are mainly two major categories of connections : point-to-point and site-to-site connections.
Point-to-point connection: This is the type used to connect two devices. It forms a secure connection between the two endpoints directly, usually used for remote access where a person can access a particular network from a different location.
We will focus in this report on point-to-point connection only.
The site-to-site connection is going to be our focus for the next report inchaalah.
Step 1: Using OpenVPN to access a distante network
The first thing we are going to configure is how we can link our machine with another distant machine, in other words, put them within the same local network even if they are physically apart.
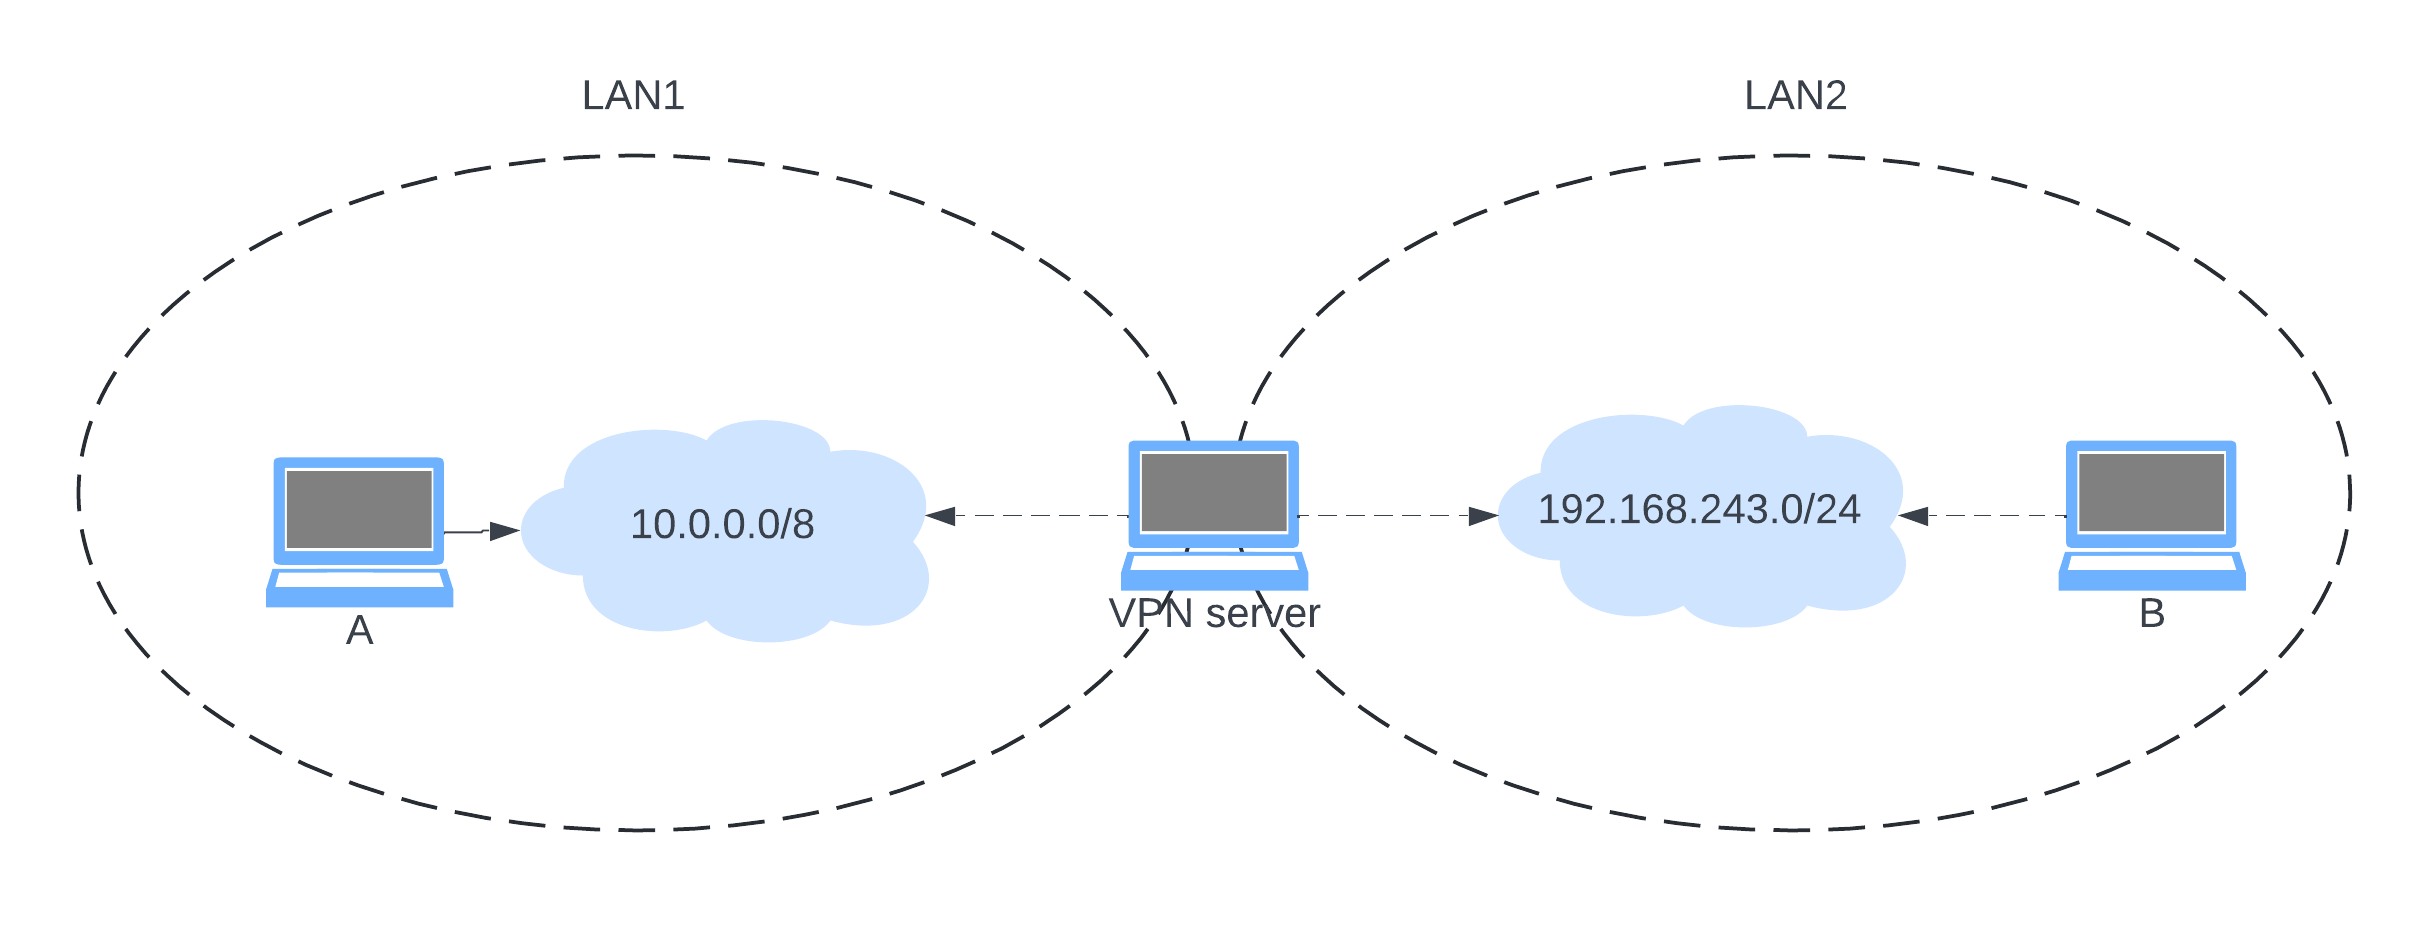
Easy : imagine two machines, A and B, which will be connected to two different networks, and obviously, they can’t talk to each other using their private IP addresses. So, in order to establish the tunnel between them, we are going to need a machine that will be connected to both networks to play the VPN server role, the following diagram explains the situation :
The use of a middle machine between two networks is similar to having a server on the internet. As long as both machines can access a mutual machine, we can establish the VPN link.
These are the machines to simulate this:
For the server, it has three interfaces: one to the Internet and one for each network from the networks of the machines.
We are using a Windows machine and an Ubuntu machine for the clients.
Now, on the server side, it’s time to install OpenVPN. To do so, we need to clone a GitHub repo. I recommend reading this insightful article by nixCraft which i user myself while researching before making this repport.
Let’s start :
1
2
3
mkdir openvpn
cd openvpn
wget https://git.io/vpn -O openvpn-install.sh
openvpn-install.sh script is very useful; it helps you manage everything related to OpenVPN, such as installing it, creating user certificates, revoking user certificates, and much more. To make it executable, run the following command:
1
chmod +x openvpn-install.sh
Let’s execute it :
1
sudo bash ./openvpn-install.sh
The first time you run this script, it will ask you to choose the interface so it can install OpenVPN and configure it accordingly.
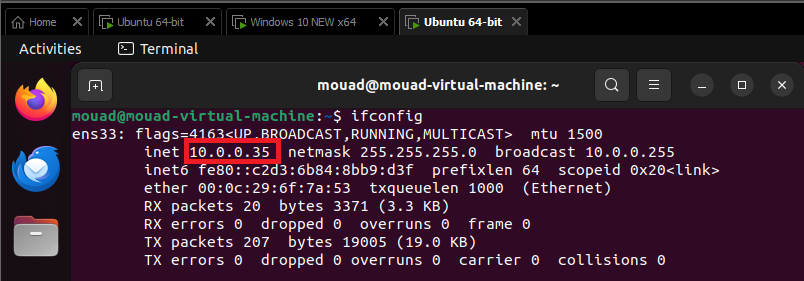
Since we are working locally, the public IPv4 address will be our private IP address, which is the address of the interface we chose earlier.
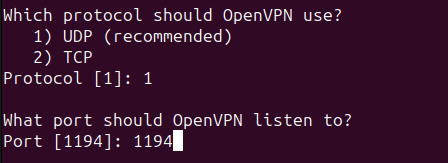
For now, we’ll keep the protocol as UDP and the port as 1194, the default port and protocol for OpenVPN. For the rest of the settings feel free to configure them however you like.
As the first client, I’ll name it client1.
From now on, the script will handle everything, from installing OpenVPN to creating the certificate and making all necessary adjustments.
Now that everything is set up, we’re ready to connect our client and see how things work.
But before, just to avoid any blocks by the firewall, we’ll execute the following commands :
1
2
sudo ufw enable
sudo ufw allow 1194
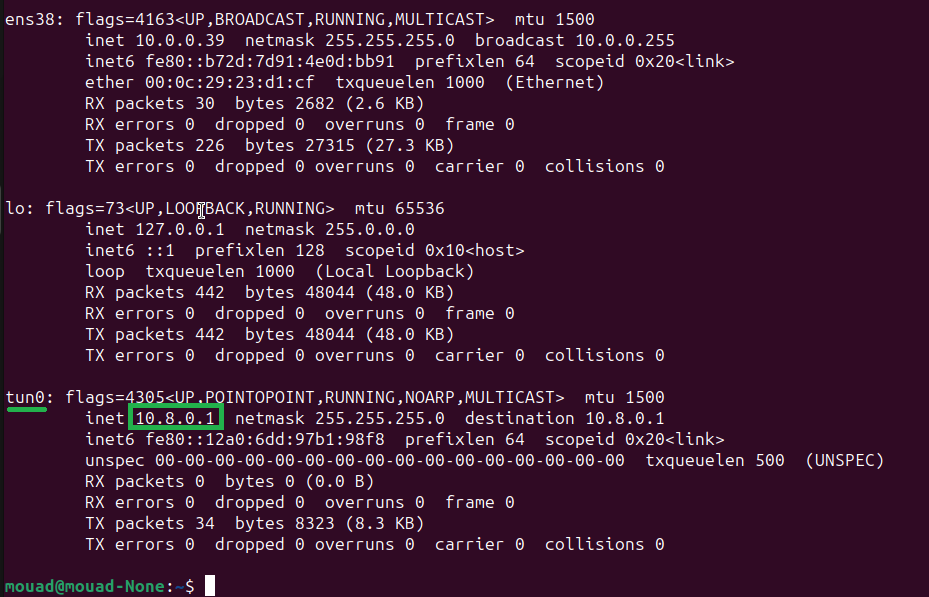
Now that everything is set up, you should see a new interface called tun added to our server.
Great!😀 So far, so good. Now, let’s go back to our client machine and connect to the server. Since we’re working with a Windows machine, we’ll need to install the OpenVPN client.
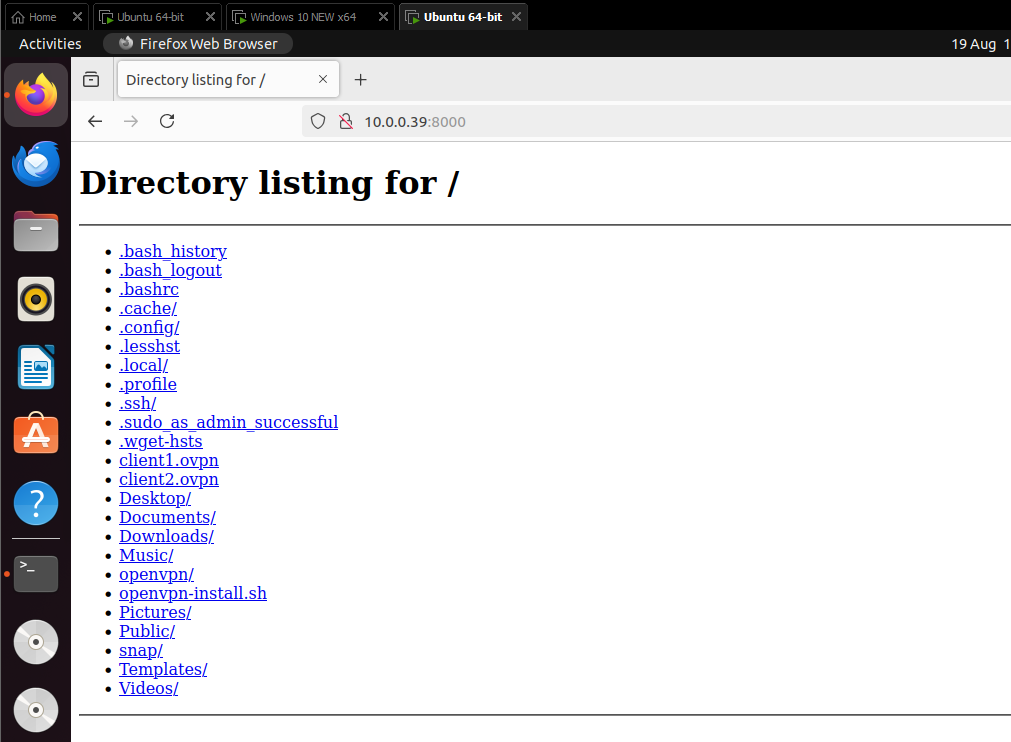
To transfer the .ovpn file from the server, let’s set up a simple HTTP server on Ubuntu:
1
2
sudo cp /root/client1.ovpn /home/Your_Username/
python3 -m http.server
Don’t forget to allow the 8000 port on your firewall.
1
sudo ufw allow 8000
Then, on the client machine, navigate to http://Your_Server_IP:8000/ so you can download it.
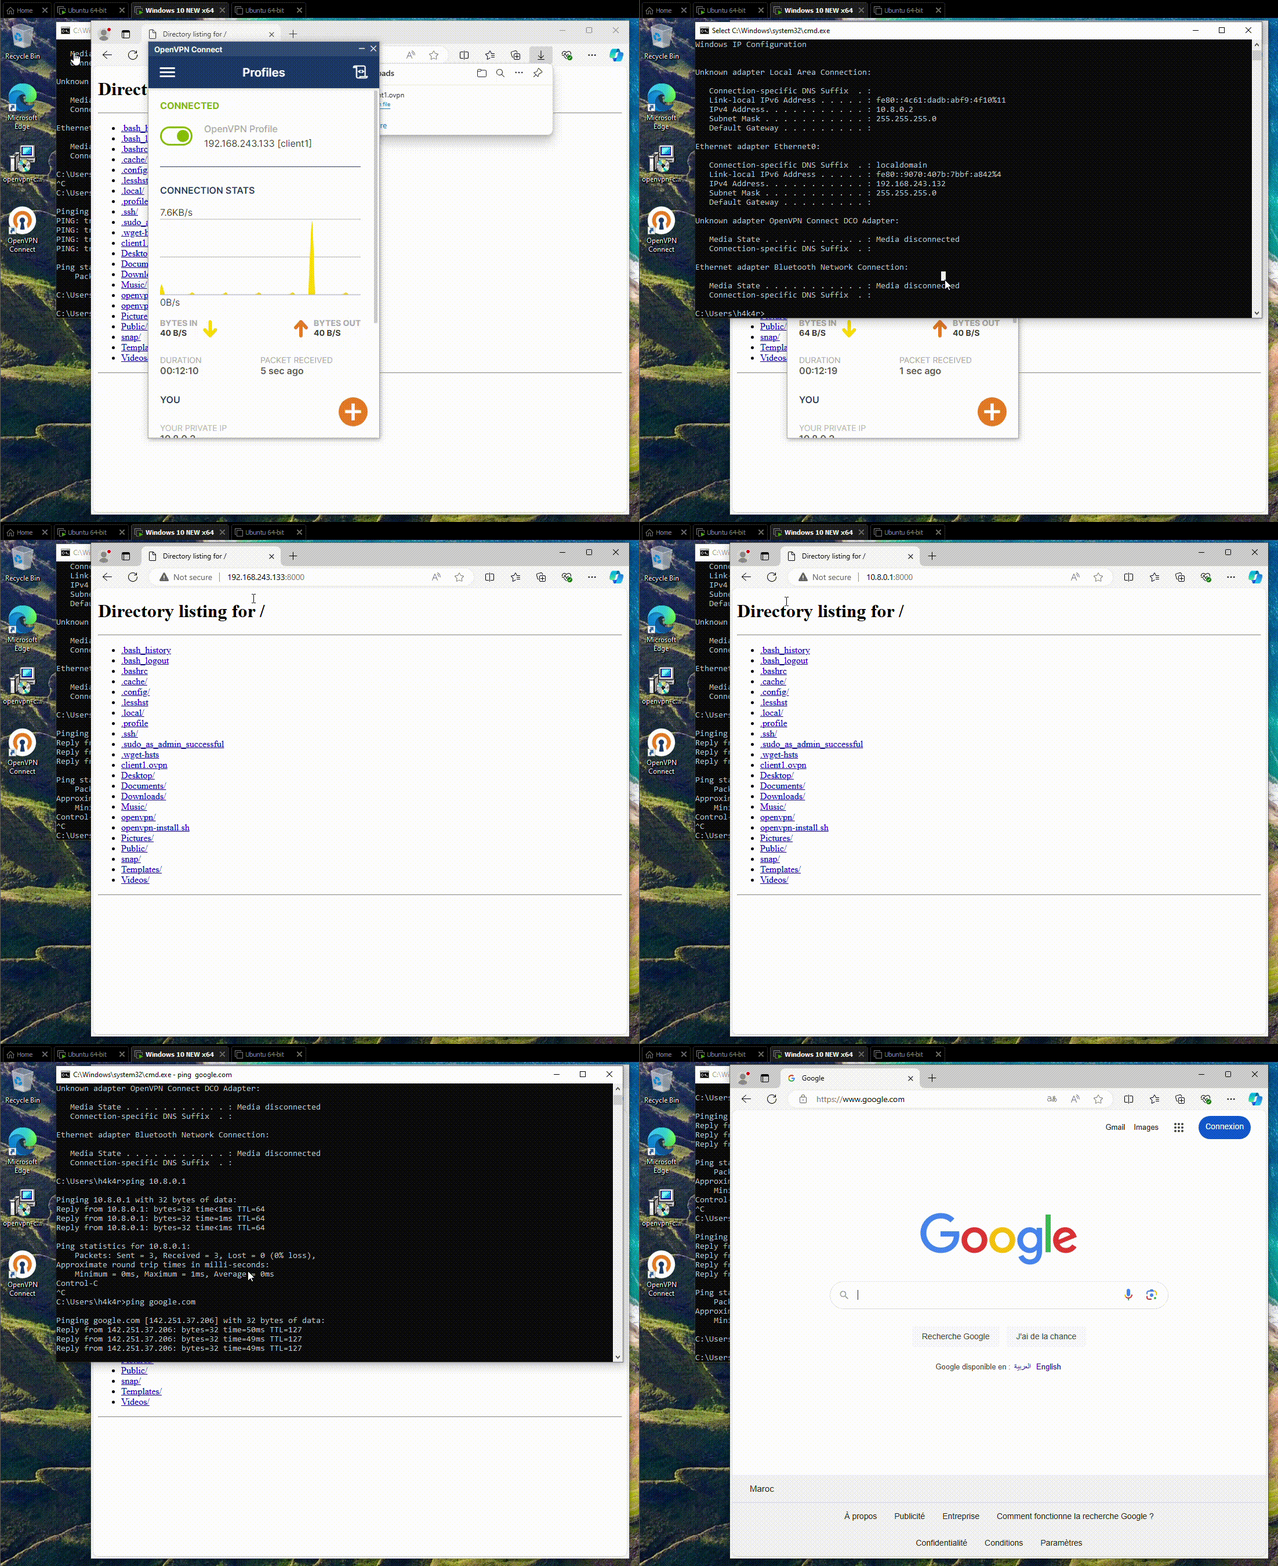
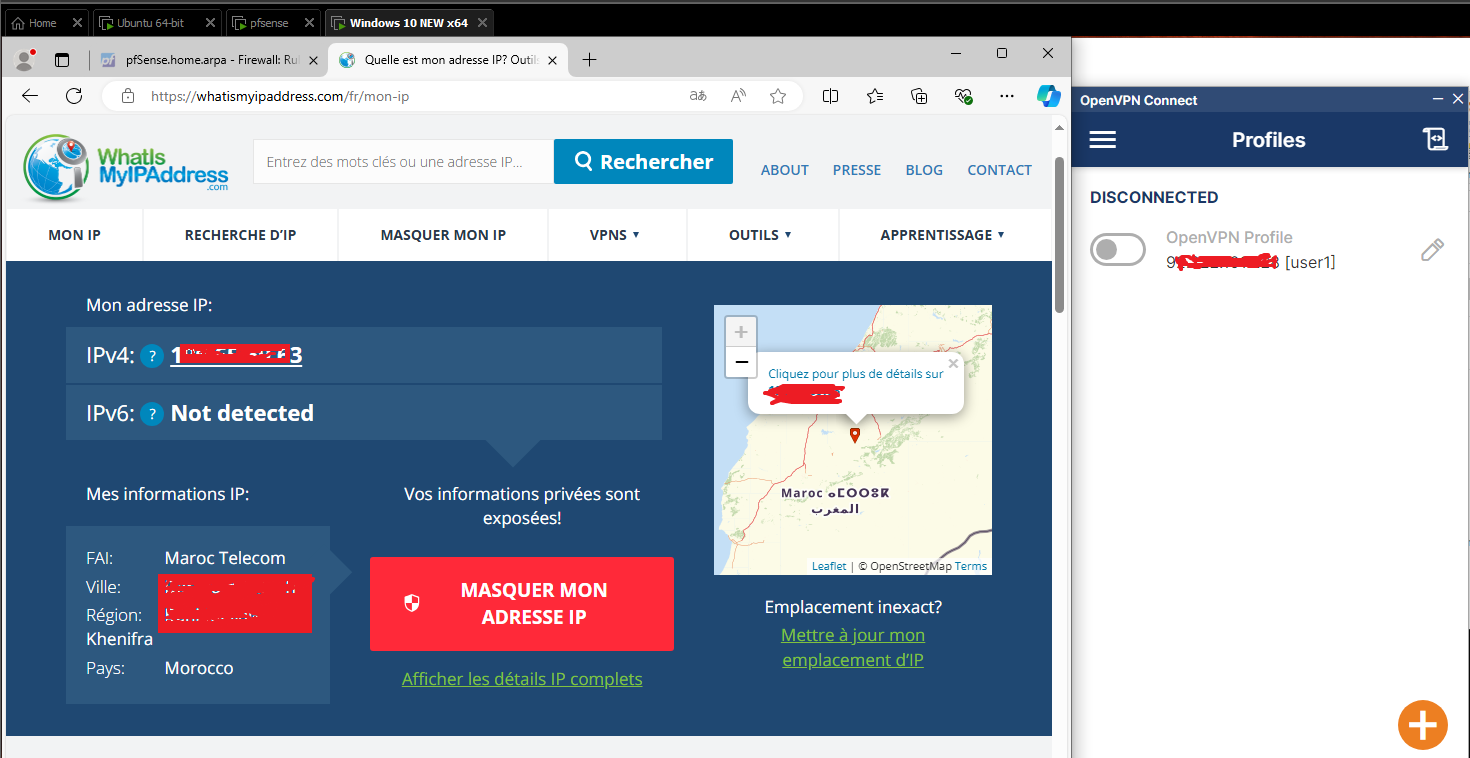
Before we connect to OpenVPN on the client side, let’s check our IP addresses and make sure we have no internet access.
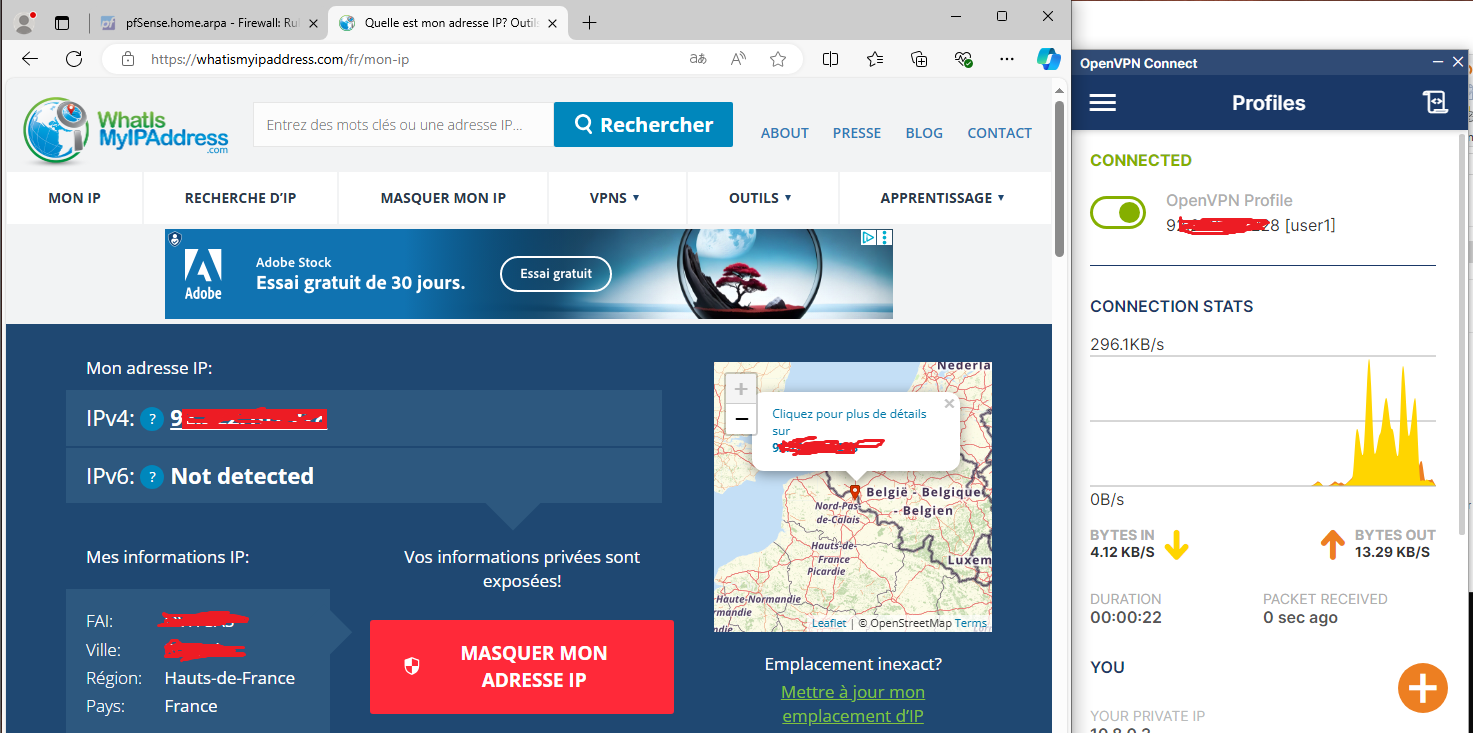
let’s connect it now.
In the client side, another interface has addedd and the ping to the internet is working :
But how did the internet access from the server reach the client? It’s all thanks to OpenVPN.
OpenVPN creates a secure tunnel between the two machines, allowing network traffic to be routed between them.
It’s workiiiing
Now, let’s set up OpenVPN on the other machine so that both clients can connect to each other.
For the second client, since we’re working with an Ubuntu machine, the configuration will be a bit different.
First, let’s install the OpenVPN client.
1
2
sudo apt update
sudo apt install openvpn
Then, let’s create a new file for the client configuration for the second client.
Before we continue, remember that we’ve set up the server to listen on just one interface. This is handy if you’re using a cloud machine with a public IP. But since we’re working with a local network for this demo, things will be a bit different.
It’s actually pretty easy. In the server’s configuration file, we need to set it to listen on all interfaces. Here’s how to do that:
1
sudo nano /etc/openvpn/server/server.conf
Next, change the IP address in the first line to 0.0.0.0.
And voilà, the problem is solved. all that’s left to do is restart the OpenVPN service.
1
sudo systemctl restart openvpn-server@server.service
From now on, the process will be the same as it was with the first Windows client.
In the client configuration file, we need to adjust the server’s IP address to match the new network.
We are good to go :
1
sudo openvpn client2.ovpn
Awesoooome
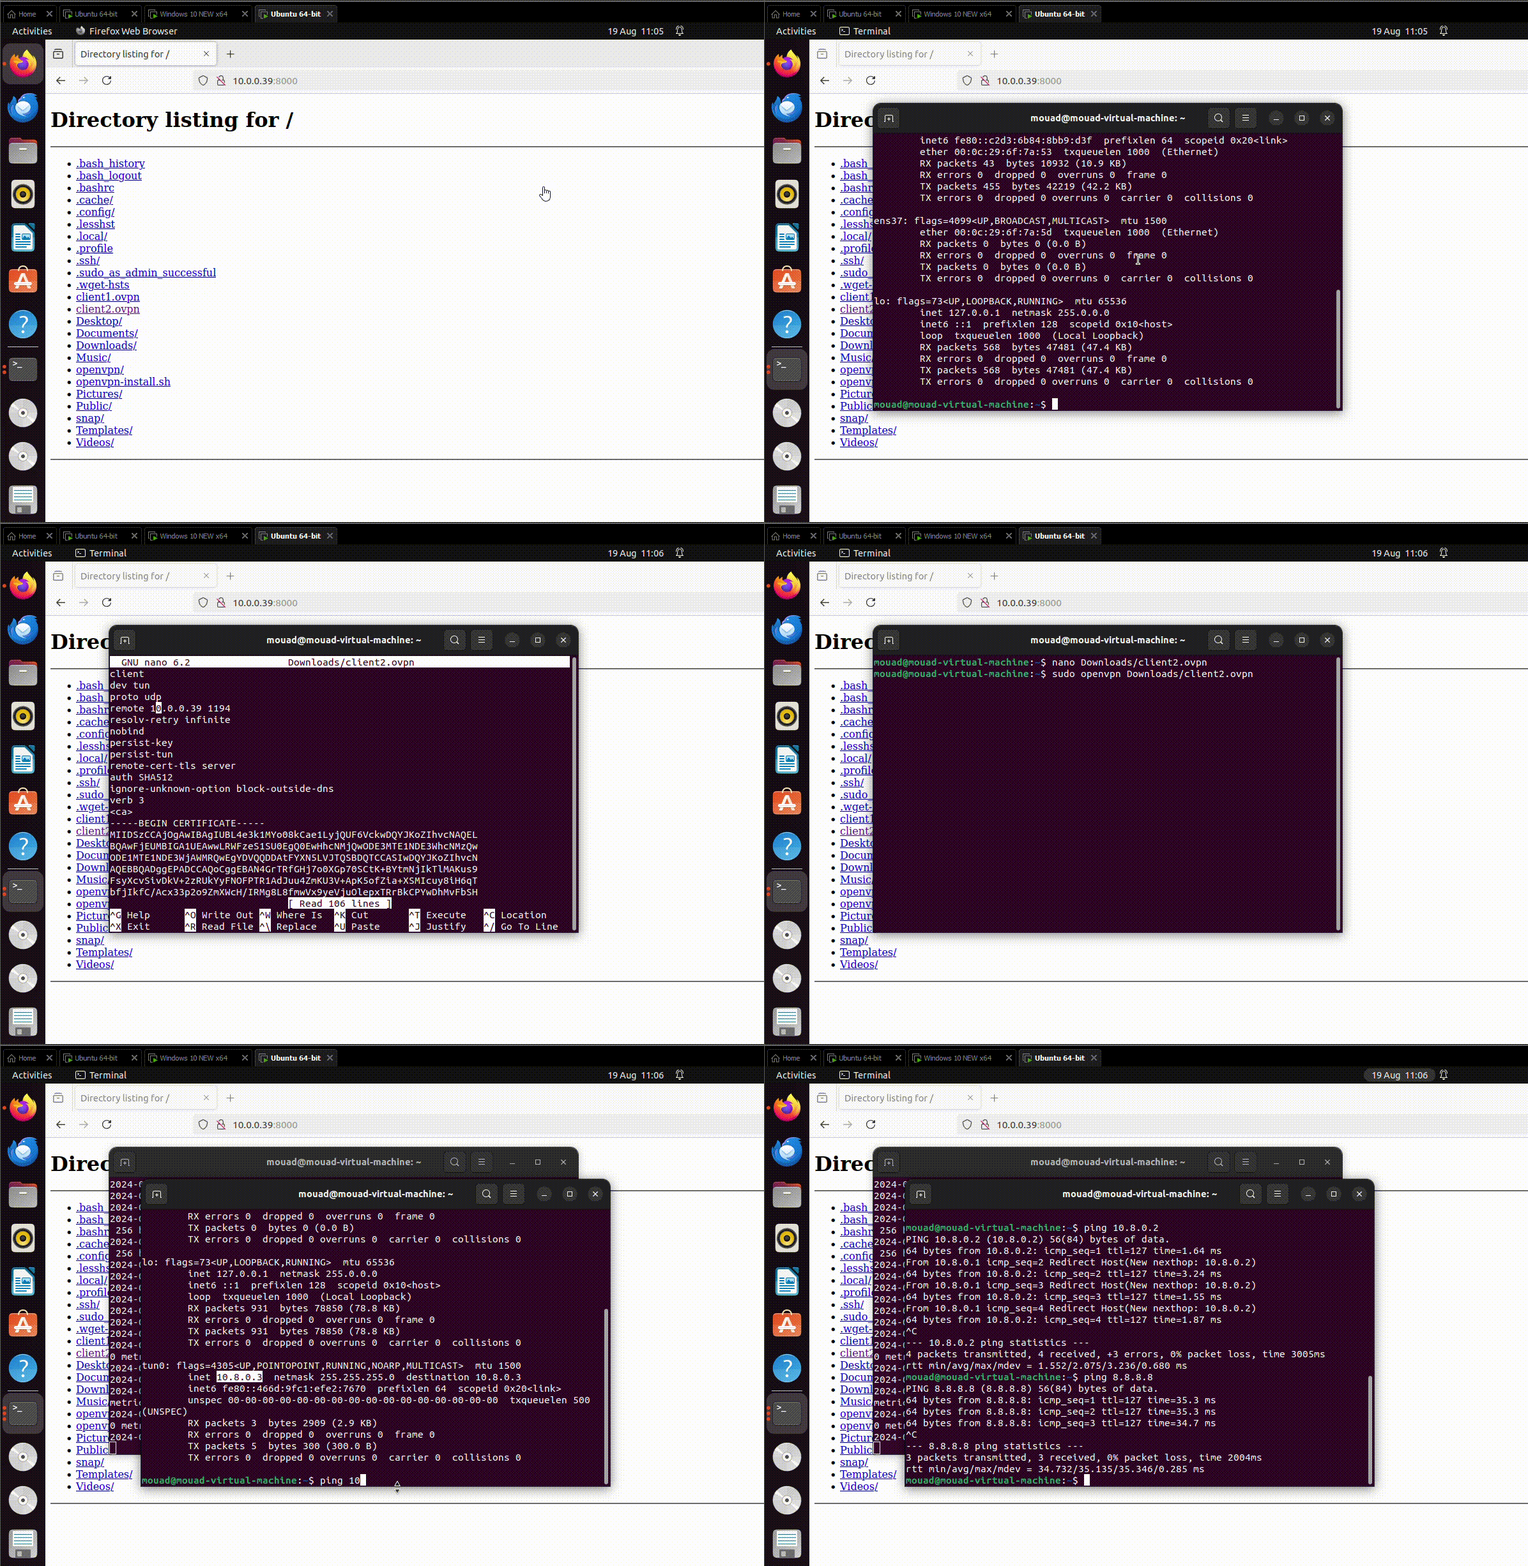
Everything is working perfectly now. The link between the two machines is established, and the clients can communicate securely over the internet.
Here’s a quick demo :
We’ve finished the first part of this report, and we’ve successfully set up a VPN connection between two separate machines. The configuration steps are available if you’d like to set up your own VPN service. Enjooooy
Step 2: Using OpenVPN to bypass firewall rules
Imagine the network admin has blocked all the ports for your favorite games like League of Legends, Valorant, Elden Ring, and even torrenting, YouTube, or WhatsApp calls or Discord or some other websites or services like SSH or OpenVPN. It’s a real shame to have all this network speed going to waste and not be able to use it for what you enjoy.
So, using what we’ve learned about VPNs and tunneling, we can easily bypass these restrictions.
Keep in mind that these restrictions are put in place to protect the network from potential attacks or to serve the company’s or infrastructure’s needs. So, use this knowledge responsibly.
So let’s start working.
For this part, you’ll need a machine with good internet speed, either your home machine or a cloud-based one. I’ll be using an Ubuntu machine in the cloud.
We’ll follow the same steps we used in the first part of the report, so review them to have an idea of what we’re doing.
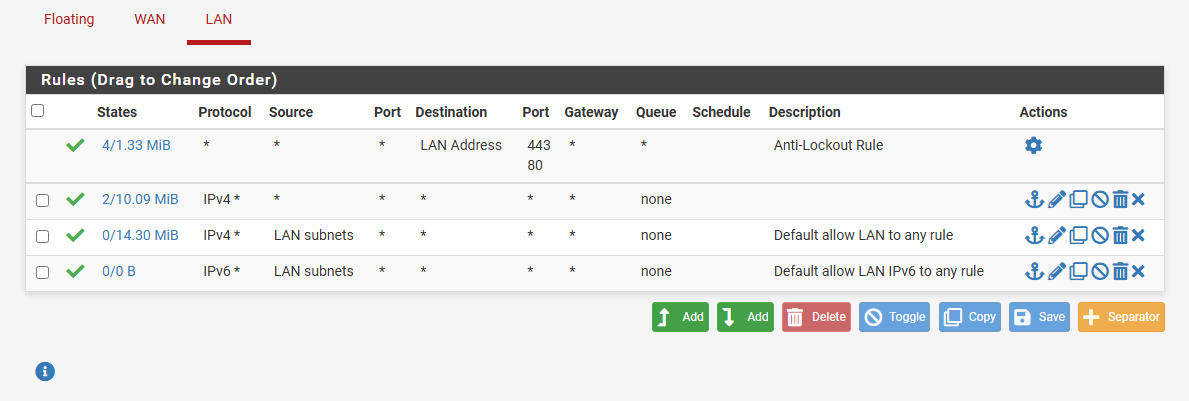
To simulate the restrictions, I’ll be using pfSense configured to block SSH.( I can’t run games on these VMs since they’re not powerful enough but the idea is the same.)
First, let’s check if SSH is working :
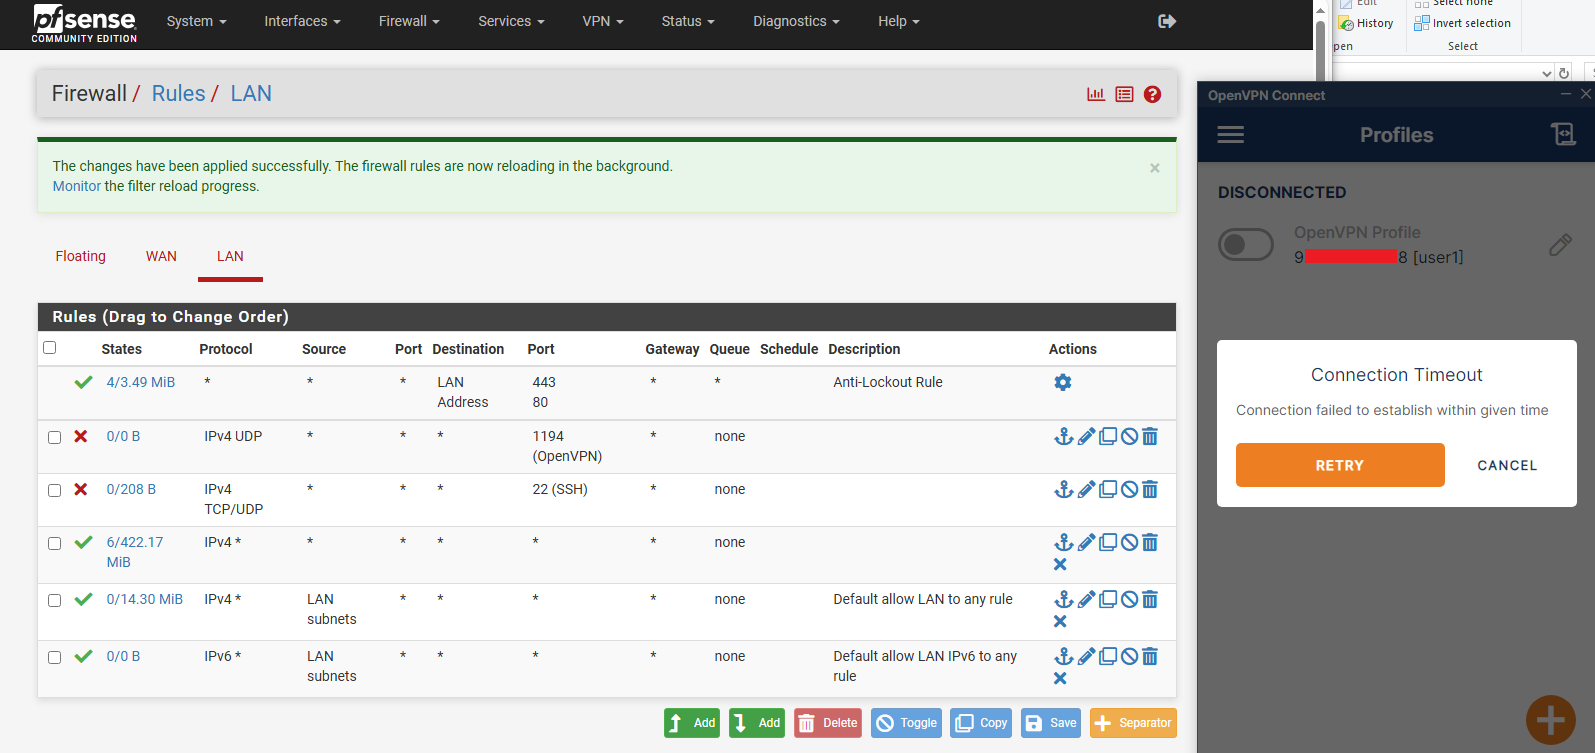
Next, let’s add a rule to block the SSH port :
Now, to bypass this, we’ll connect to the VPN we set up. I’m using my cloud-based Ubuntu server as the VPN server. Let’s see if this works:
Cool, now that we’ve bypassed the firewall rule, as long as the VPN server doesn’t impose restrictions on certain ports, you can access them even if your network firewall blocks them.
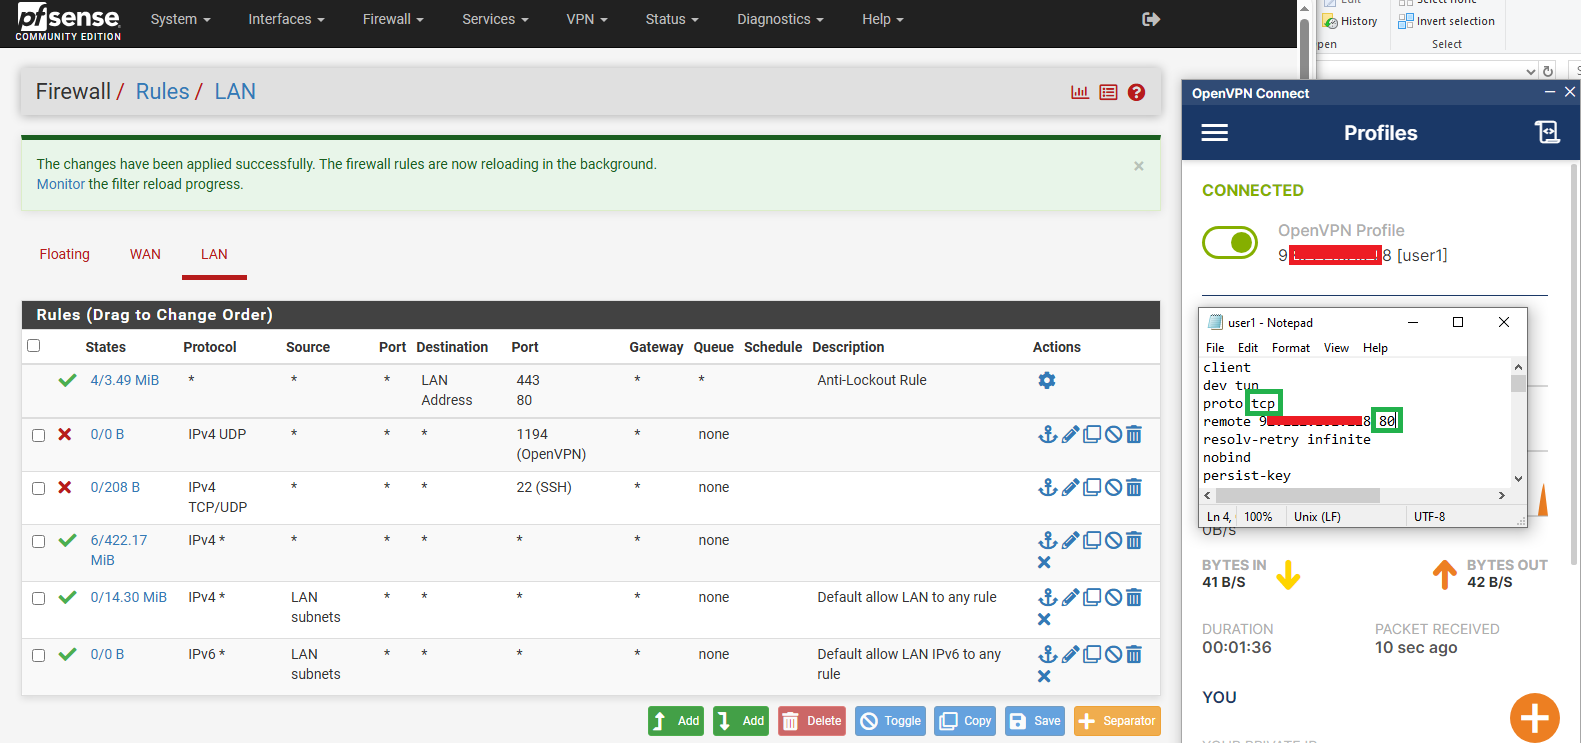
But, since we’ve set up the VPN to use UDP port 1194, which is the default for OpenVPN, it’s possible the admin might have already anticipated this and blocked that port.
To get around this, we’ll need to set up the VPN server and clients to use a different port and protocol. Typically, ports like 8080 or 443 are almost always open, so we can use these common ports to connect to our VPN.
To do this, On the server side we simply need to change a few settings :
1
sudo nano /etc/openvpn/server/server.conf
1
sudo systemctl restart openvpn-server@server.service
And on the client file we already have, we need to do the same
And with that we’ve bypassed the rules of your firewall. Enjooyyy
Conclusion
In this tutorial, we have learned how to bypass the firewall rules on a network using a VPN. We used Openvpn to set up our own vpn. Sometimes this could be very useful in some infrastructures, which means using some blocked ports or accessing some blocked websites. Keep in mind that those rules serve the purpose of your own security or the security of the infrastructure in general.
See you in another report. ✌️
