Configuration of the Captive Portal on pfSense with FreeRADIUS - PART 2 : Integration of MySQL Database
Configuration of the Captive Portal on pfSense with FreeRADIUS - PART 2
✋ This report is a follow-up to the previous report about configuring a captive portal in pfSense using FreeRADIUS. This time, I’ve added some new elements to make it more interesting.🙂
Overview
📋 Table of Contents
Introduction
In the previous report, I covered a step-by-step tutorial on how to link a captive portal with a FreeRADIUS server to manage access to the network using pfSense. It is very useful for controlling who can access your network.
Last time, the setup was based on using a text file that the FreeRADIUS server fetches to find the usernames and passwords. For a small infrastructure, this works quite well. However, for larger infrastructures, managing a vast number of modifications with a text file can become complicated in terms of data loss or speed.
That’s why I worked on optimizing it. Instead of using a text file, we will use a MySQL database, which will be much more efficient, especially for this task.
this time i’ll be using 3 virtual machines
- Ubuntu 23.04 as a FreeRADIUS server and MySQL server.
- Ubuntu 20.04 as a client in the network (for tests)
- pfsense
The steps for installing pfSense and configuring it remain the same for this project as well. I recommend reviewing the previous report by clicking here.
So let’s get started.
Configuration
Step 1: Installing FreeRADIUS
At this step, I’ll be using two virtual machines. In the first one, I’ll install the FreeRADIUS server using the following commands:
1
2
3
4
5
6
7
8
# Update the package manager
sudo apt update

# Install FreeRADIUS
sudo apt install freeradius freeradius-mysql freeradius-utils -y

# Start the FreeRADIUS service
sudo systemctl start freeradius
To check if everything went well, execute this command to see the status of FreeRADIUS:
1
sudo systemctl status freeradius
You should get a result similar to this one:
Things are fine here for now; we’ll leave it as it is and move on to the next step, which is configuring the MySQL database.
Step 2: Setting up mysql database
Let’s start by configuring MySQL in our VM. I’ll be using an Ubuntu machine. Let’s begin by installing the MySQL packages.
1
2
3
4
5
# Update the package manager
sudo apt update

# Install MySQL
sudo apt install mysql-server mysql-client -y
Now, let’s create our database. It will be named radius.
First, connect to mysql as root:
1
mysql -u root -p
Now let’s create the database:
1
2
CREATE DATABASE radius;
exit
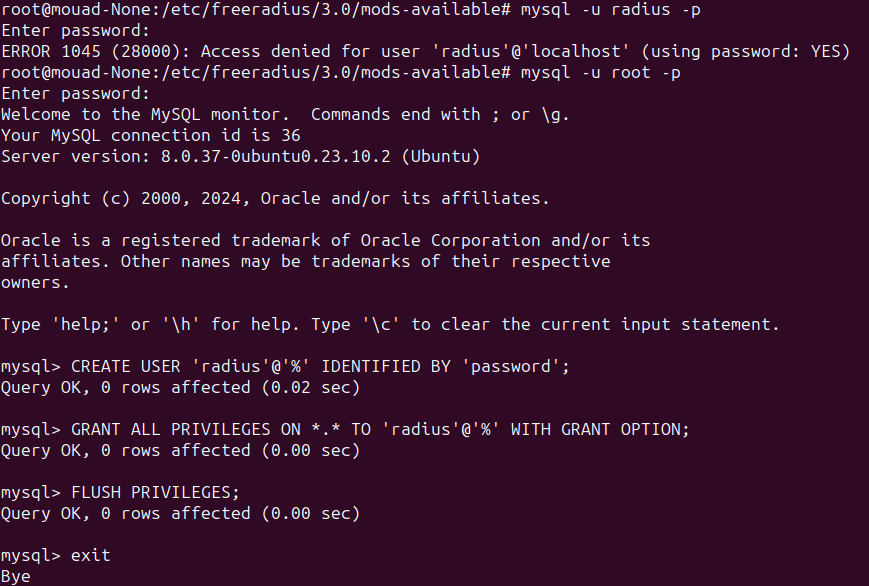
Let’s add a user that we will use from now on. Using the root user to access the database is not quite secure.
To do so :
1
2
3
CREATE USER 'radius'@'%' IDENTIFIED BY 'password';
GRANT ALL PRIVILEGES ON *.* TO 'radius'@'%' WITH GRANT OPTION;
FLUSH PRIVILEGES;
Now the database and the user are created, let’s import the schemas provided by FreeRADIUS, using the following commands :
1
2
3
cd /etc/freeradius/3.0/mods-config/sql/main/mysql/

mysql -uroot -p radius < schema.sql
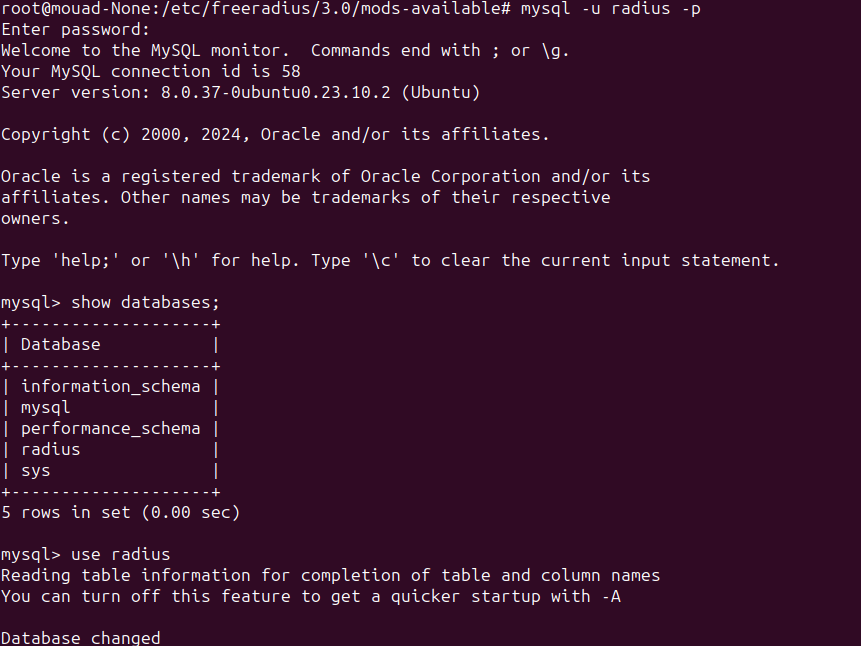
After importing the schemas, you should see tables like this:
Now this phase is completed successfully. Let’s link the previous phases together.
Step 3: Linking FreeRADIUS with MySQL database
Now, to link FreeRADIUS and MySQL, let’s take a look at how things work.
In FreeRADIUS, modules are stored in the mods-available directory, and only those that are enabled are linked in the mods-enabled directory. By creating a symbolic link to the sql module in the mods-enabled directory, you enable the SQL module, allowing FreeRADIUS to use SQL databases for authentication, authorization, and accounting.
To do so, let’s navigate to the mods-enabled directory where enabled FreeRADIUS modules are linked.
1
cd /etc/freeradius/3.0/mods-enabled
Now, we’ll enable the SQL module by creating a symbolic link to it from the mods-available directory.
1
ln -s ../mods-available/sql sql
Like this :
Ok, let’s start configuring FreeRADIUS to use MySQL.
1
2
cd /etc/freeradius/3.0/sites-available/
nano default
By editing the default configuration file, we can modify the settings of the default configuration in FreeRADIUS.
You should modify these file sections to get something like this :
1
2
3
4
5
6
7
8
9
10
11
12
13
14
15
16
17
18
19
authorize {
.....
sql
....
}
accounting {
......
sql
....
}
post-auth {
......
sql
....
}
session{
......
sql
.....}
Make sure to remove any - before sql in theses sections.
Now, let’s configure freeradius to connect the mysql database.
1
2
cd /etc/freeradius/3.0/mods-available
nano sql
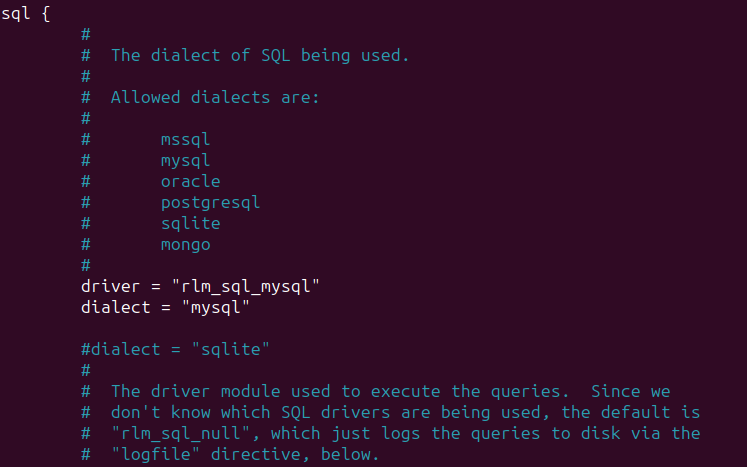
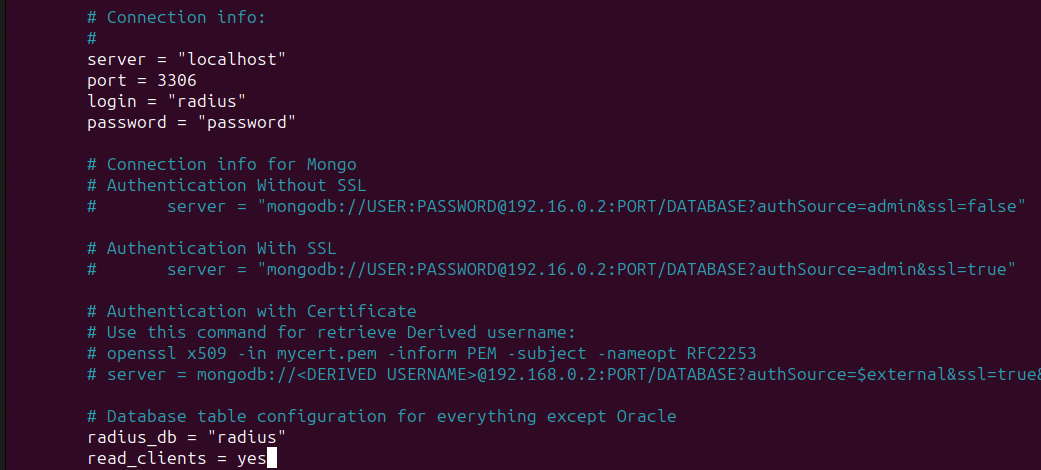
make sure the config file has the following lines :
1
2
3
4
5
6
7
8
driver = "rlm_sql_mysql"
dialect = "mysql"
server = "localhost"
port = 3306
login = "radius"
password = "password"
radius_db = "radius"
read_clients = yes
Make sure you have the username and password correct. You can use the root user or any other user that has permission to access the database.
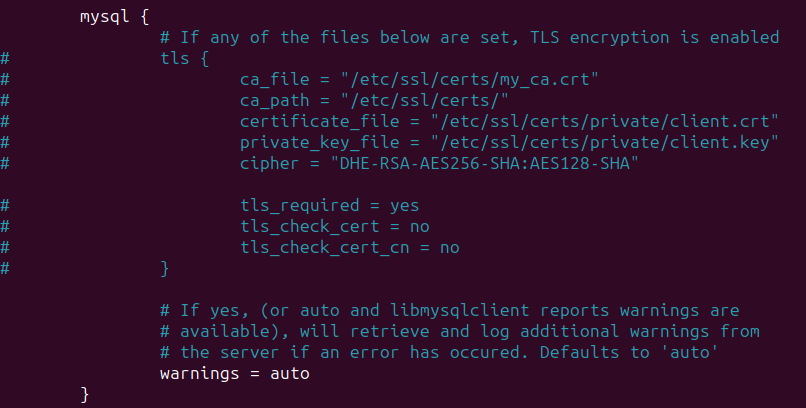
Make sure to comment out all the lines in the MySQL TLS section. It creates a lot of conflicts, especially since we are the ones configuring this, so we are confident about who can use it.
Now we’re almost there, just a little bit more.
Restart the FreeRADIUS service.
Let’s check the status of the port that FreeRADIUS uses to listen:
1
netstat -lnp | grep 1812
Now that everything is working fine, let’s add some data to our database.
All the users will be stored in the table named radcheck.
Login as the user radius, and add some data to the database:
1
2
3
USE radius;

INSERT INTO radcheck (username, attribute, op, value) VALUES ('testuser', 'Cleartext-Password', ':=', 'testpassword');
I’m using testuser as the username and testpassword as the password.
Let’s see if it works:
1
radtest testuser testpassword localhost 1812 testing123
Let’s test it out from another machine:
To do so, we need to configure something in the clients.conf file to allow requests from other machines.
1
nano /etc/freeradius/3.0/clients.conf
Restart FreeRADIUS, and now you are good to go.
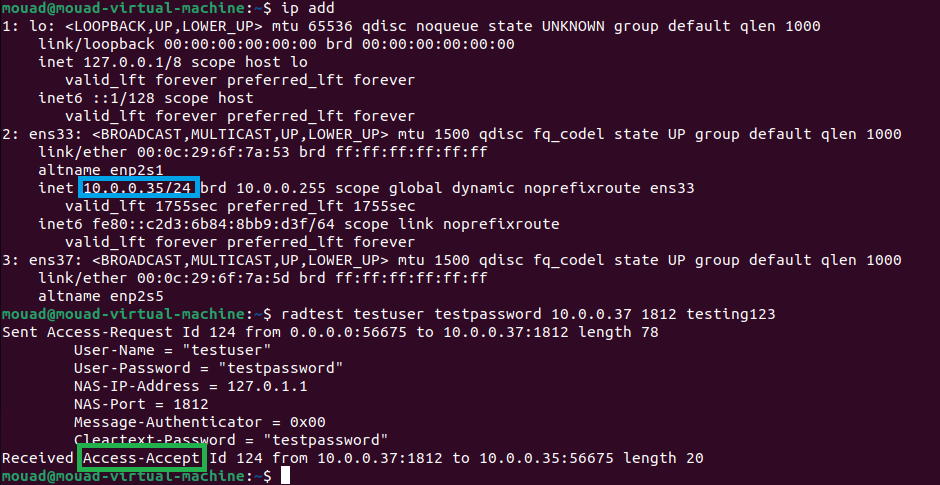
the ip adress of our FreeRADIUS server is 10.0.0.37, the request will be the following :
1
radtest testuser testpassword 10.0.0.37 1812 testing123
Now with a wrong password :
Awesooome!! Let’s get to configure the captive portal with our server.
Step 4: Configuring Captive Portal
These steps will be similar to the previous report, except for some changes in the IP addresses.
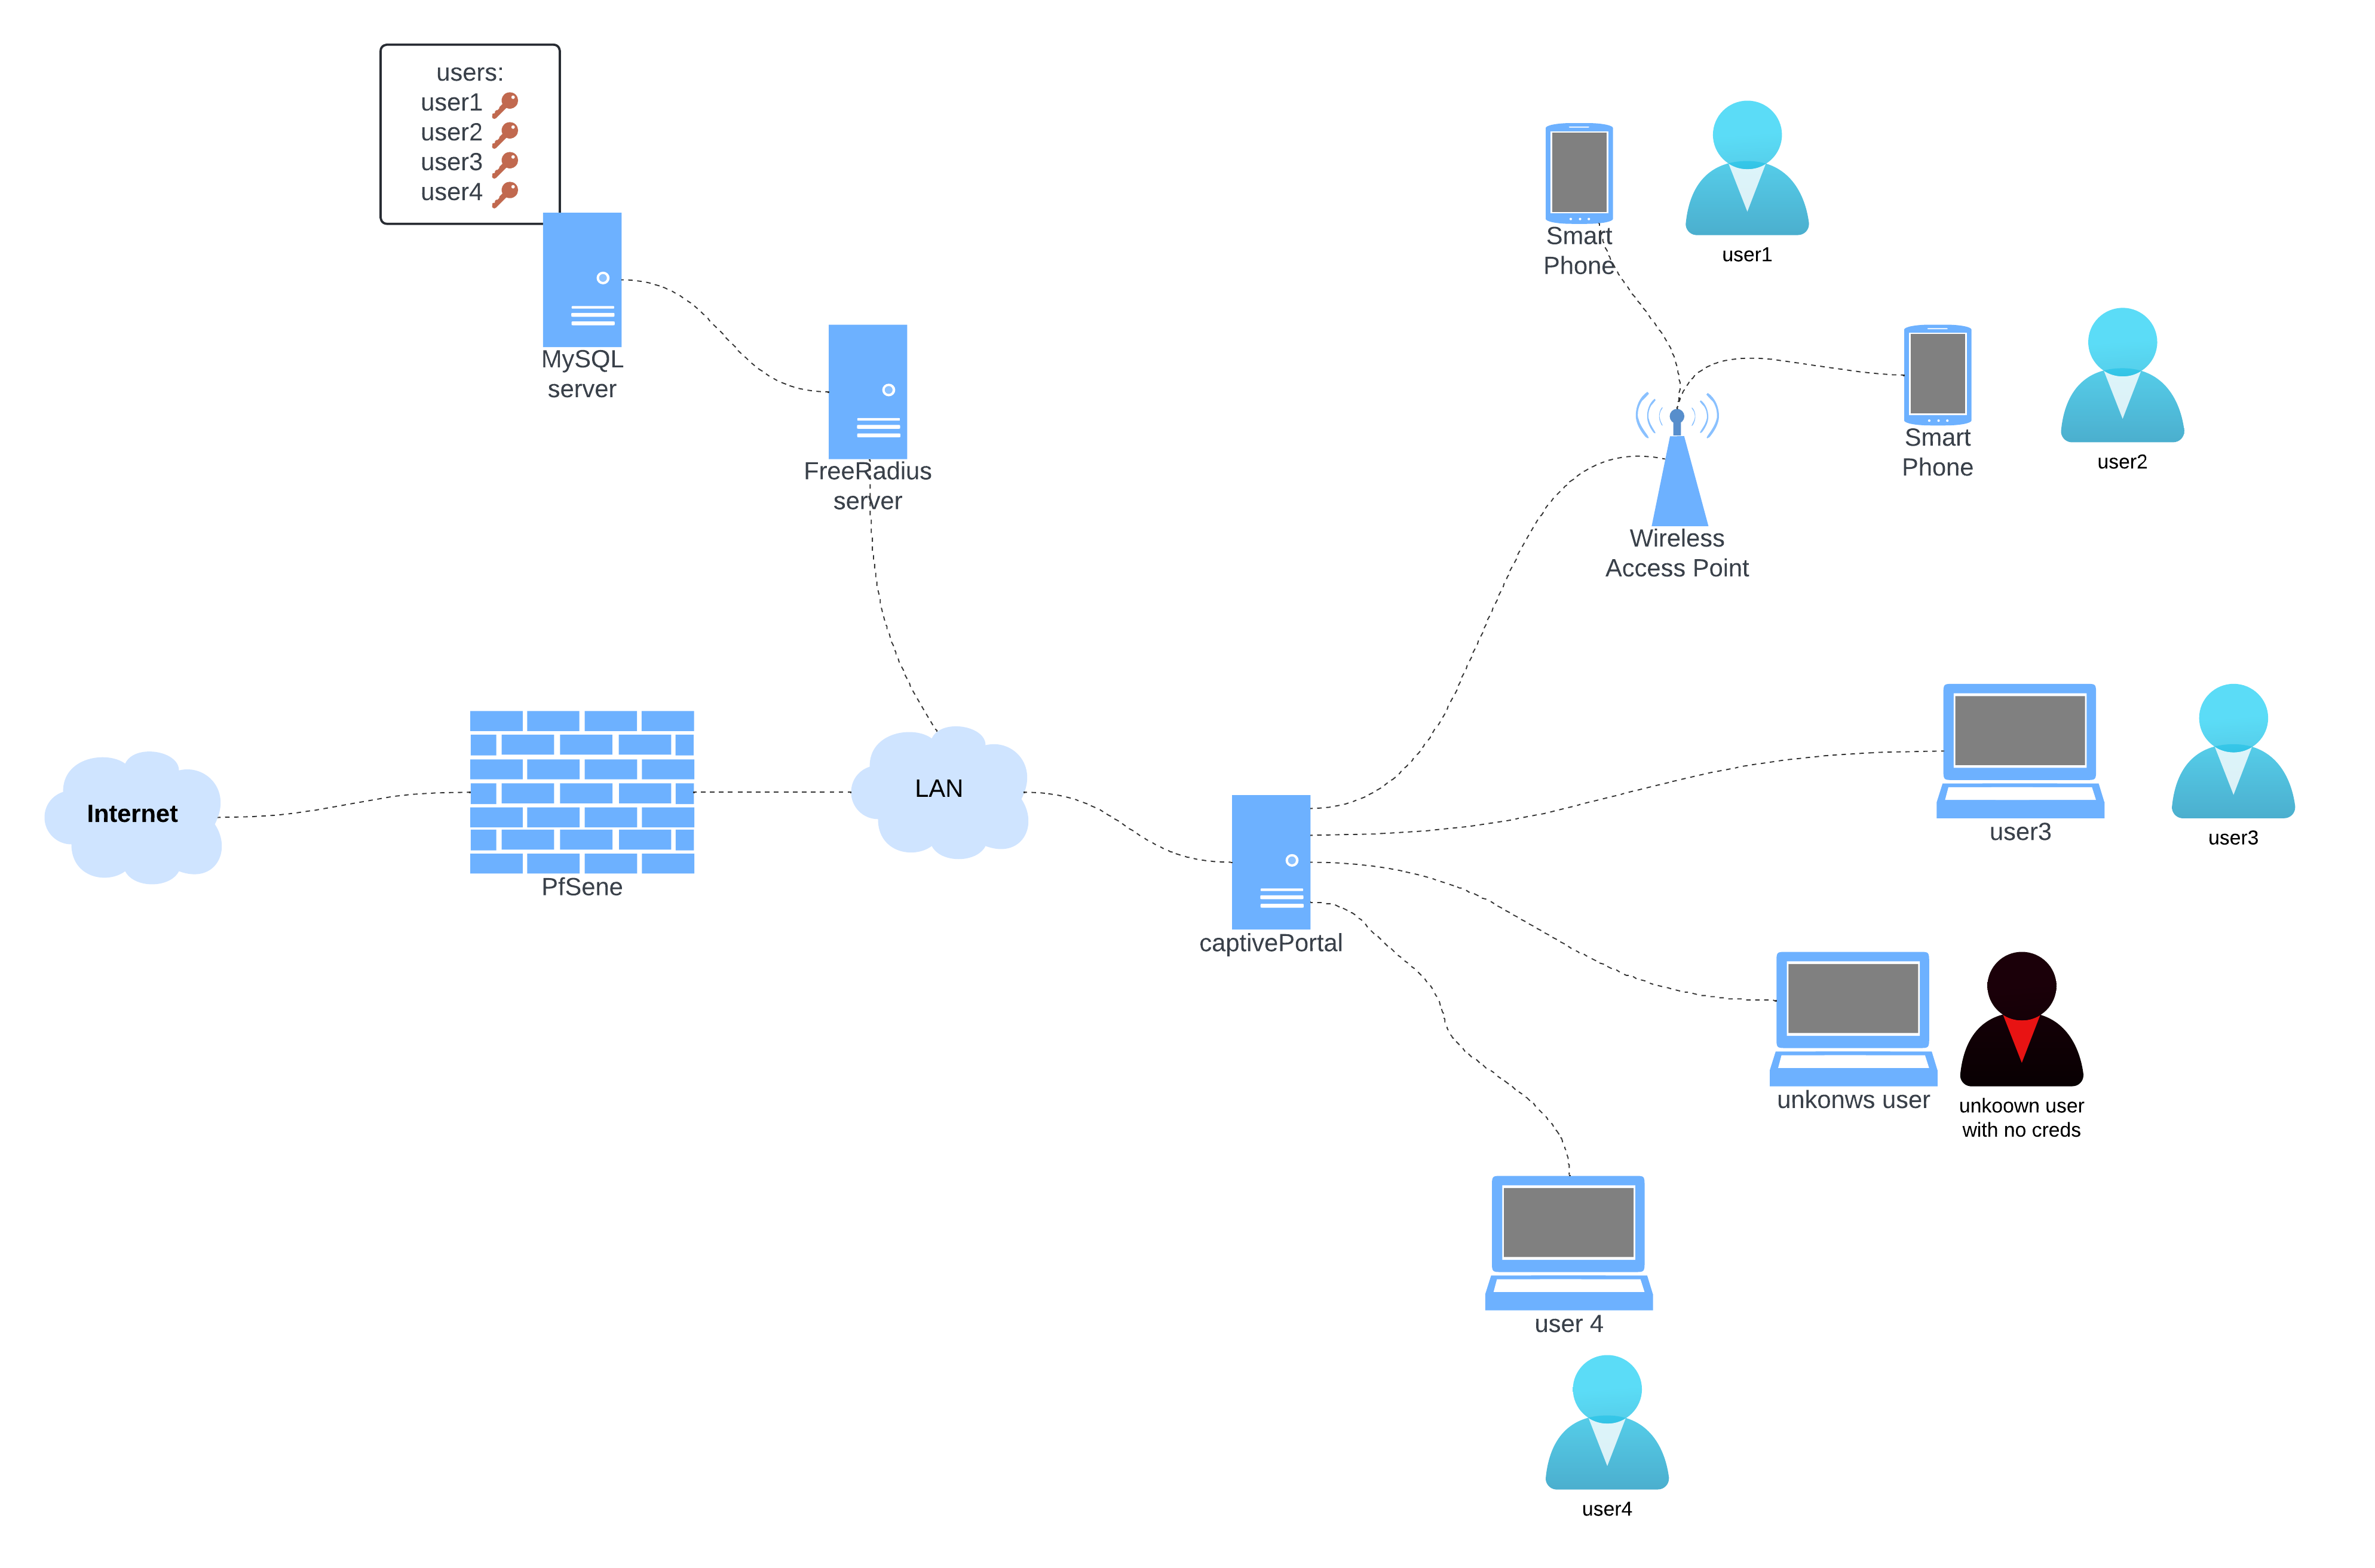
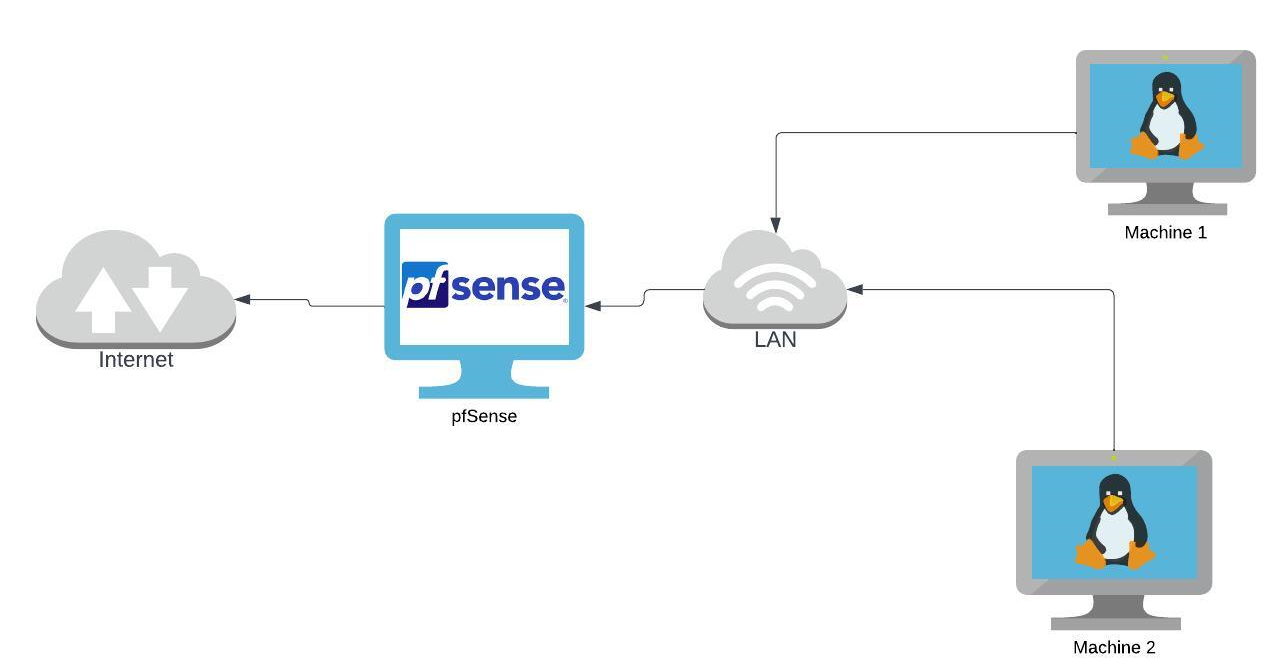
This is the architecture we’ll be working with right now.
Let’s proceed to link pfSense with the FreeRADIUS server we configured.
Let’s start by creating the FreeRADIUS user in the user manager.
In the authentication server section, we will add a new user. I have already created the user under the name ‘freeradius’ :
Let’s create the FreeRADIUS user by providing the necessary information such as IP address, ports, and shared secret. In my case: the IP address of the Ubuntu machine is 192.168.1.101.
After configuring the FreeRADIUS user, we will now proceed to configure the settings in the CaptivePortal section.
Make sure you have all the necessary details and have configured the settings properly.
Now, everything is properly configured.
To connect to the Internet, valid credentials configured in the FreeRADIUS users file must be provided. For this :
If the browser does not offer the option to open the authentication interface, you can access it via the following link:
http://192.168.1.1:8002/index.php?zone=myzone
192.168.1.1 is the address of pfSense, and myzone is the name of the Captive Portal configuration.
You should get this :
Let’s try using the credentials ‘usertest’ and ‘testpassword’.
Now, I will add more usernames to the database :
Regarding the status of the Captive Portal in pfSense:
In the case of incorrect credentials, it returns this.
To add another measure to ensure everything works well, be sure to configure the radcheck table to accept usernames only once to prevent any confusion or disruptions in the working solution.
1
ALTER TABLE radcheck ADD CONSTRAINT uc_username UNIQUE (username);
Conclusion
By following these steps, you can successfully link pfSense’s Captive Portal with a FreeRADIUS server that uses a MySQL database as a reference for usernames and passwords.
This solution greatly simplifies and stabilizes the management of network access in a large infrastructure.
Overall, implementing a Captive Portal with FreeRADIUS on pfSense enhances network security and control while providing flexibility and ease of management.
✌️ Thanks for reading once again.
See you in another report.
